Thursday 26 September 2013

Spreading your wings...

Hello!
A few days ago I spotted a rather interesting post on the Stampotique designers blog... a DT call in fact. Now, as any of you regular readers out there will know,  I use a Stampotique image on rather a lot of my art! I just adore the quirkiness of the figures in particular! Stampotique would be my number one choice stamp company to design for, so as this kind of opportunity doesn't come around all that often, I thought I'd be brave and have a go at making the team!
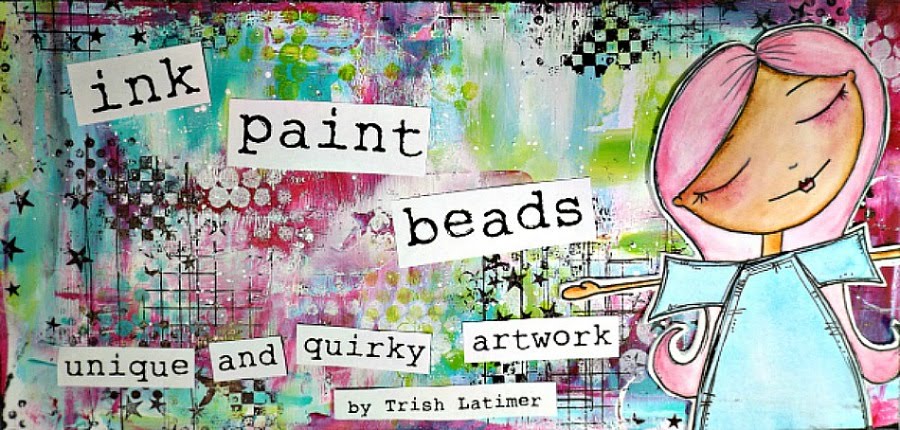
My creation today is a very typical 'me' project....it's all about the painty layers!
I love creating backgrounds with inks and sprays, but my most favourite medium to use is paint. Lots and lots of paint! I thought I'd take you through the stages in my painty background, so brace yourselves, there are just a few pictures!!
 For this piece I've used regular white cardstock as my base, but the painty layering technique will work on anything!
Start off by smearing colour over your base...
Roughly, any old how is great! Then, roughly brayer over some white paint.....
This gives texture as well as the colour variations! Next, more paint. A different colour...
More brayering and adding colour until you're happy with the way it looks. I decided to brighten up the scheme a bit with some zingy yellow...
Once you love your basic background, you can start to add detail. I've used stencils to add shapes..
I've used the three colours we already used (plus white) to keep it cohesive. Printing next....
Bottle tops and Lego pieces! Have a look around the house for interesting textures to print with, its great fun! Next, I added background stamping. This is done with black Archival ink, and I used unmounted stamps.This way, you can just add tiny random bits of stamping wherever you choose....
Next I did a little stitching around the edges, and randomly over the background too. This is why I chose cardstock rather than chipboard to work on! This amount of painty layers on cardstock does tend to make it curl up a little, but this can easily be flattened out!
My next layer is what I call my 'pop' colour! Everything is pretty tonal so far, so we need some 'oomph' to catch the eye... I chose a violet colour...
For this piece I didn't go overboard with the violet, a little around the distressed edges and smidges here and there! That's the background done, next thing is to add my main image...
I chose Mela, one of my favourite Stampotique ladies! As many of you will know, I really like keeping my figures black and white as a contrast to the bright coloured backgrounds, although I have been known to add colour sometimes! Mela has triple layered wings...
The Big Bee stamp by Jo Capper Sandon is great for fairy wings! I've used acetate, book pages and painted cardstock for my layers. She also has a little wonky crown...
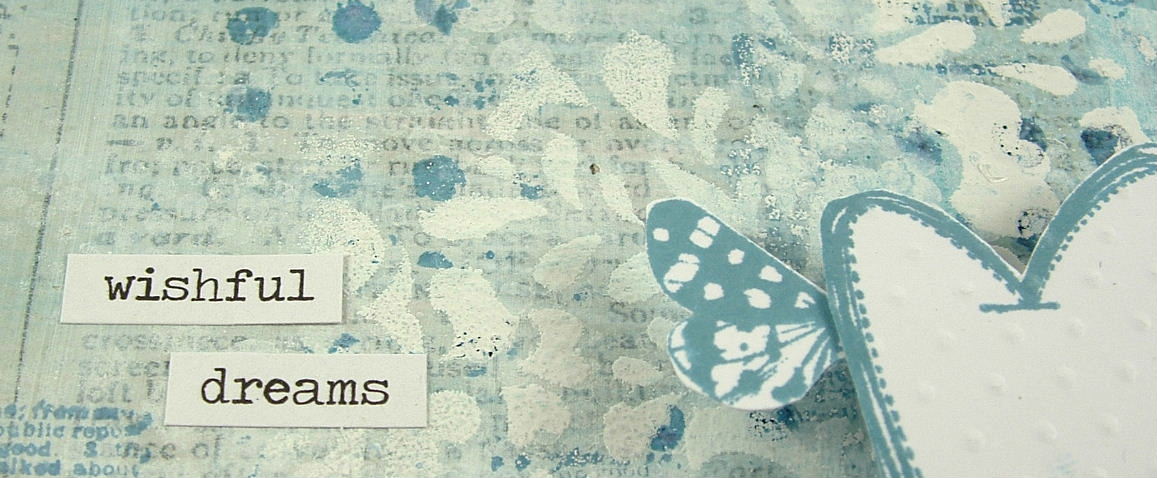
Another Jo Capper Sandon favourite stamp! I have used a cut out phrase from an old book as my title for this....
You can find some great words if you spend the time to go through the text! I find old romance novels good for this!
So, loads of painty layers all build up to give loads of interest..
and the stitching gives that extra bit of texture (and somewhere for the figure to stand!)
Phew...are you still awake?!!
So, that's how I created my painty layered background, hope you like it!
Have a great day everyone,
Trish xxxxx


Wednesday 25 September 2013

So Beautiful...

Hello!
My turn over at the A Sprinkle Of Imagination creative team blog today!
Here is one of those annoying sneak peeks....
To see the whole thing, please hop on over here!!
Have a lovely day,
Trish xxx

Monday 23 September 2013

Bird (house) on a wire!

Hello!
Today I'm sharing a birdhouse project over at Calico Crafts!
 Little peek...
I'd love it if you popped over to the Calico Crafts blog here and had a look at the whole thing!
Have a great day!
Trish xxxx

Friday 20 September 2013

Flying Heart..

Hello!
I've been having a play with one of my most favourite things to create on...a large wooden heart!
I get my wooden hearts from all over the place, (Dunelm Mill has lots right now) , but these particular ones are Artemio hearts (THESE ones). I've obviously cut the dangly ones from the large one, and only used one small heart in this project though!
I coloured the large wooden heart with turquoise and white paint, then once it was dry added the first bit of stamping. The rough and uneven surface of the wood means that getting nice detail and crisp lines from a stamped image isn't easy. In fact it's near enough impossible! The text and flourish on my heart were stamped onto tissue paper, then the tissue was adhered to the wood with Mod Podge. Once the Mod Podge dries, it turns the tissue transparent so you are left with a crisp and clear image that looks like you stamped it directly to the surface!
The other good thing about using tissue is that you have now covered parts of the rough surface, enabling you to stamp successfully on top! Remember though, you are in effect stamping onto dried glue (plastic!) so use something that will work. I used paint to stamp my blue dots and white gridlines....
The smaller heart was painted red, then covered with crackle paint. Once the crackle was dry, I sponged on more paint. I wanted the crackle, but not the shine!
I added a little word to the red heart, this is a rub on that I've put onto white card first.
The wings are very simply stamped onto card and glued to the back of the heart!
I made some loops with wire, then attached then to the back of the heart...
added some chain, then joined the chain to the hanger....
The hanger is simply a driftwood stick, painted and stamped to match the heart. More wire loops!
I'm linking up today with the current challenge over at Simon Says Stamp Monday Challenge
The team are asking us to stamp on anything but plain paper, so I think tissue, wood and dried glue should count for that!
Have a great day!
Trish xxxxx


Wednesday 18 September 2013

Follow Your Heart

Hello!
My turn over at  A Sprinkle Of Imagination today...... I've created a hanging dangly thing! Intrigued? Maybe this pic will help.....
Um, that didn't help? Pop on over to the ASOI creative team blog and check it out in full!
Have a fab day,
Trish xxxx

Friday 13 September 2013

Cool Blues...

Hello!
Just blue and white from me today..... Here is a little look at my DT project for A Sprinkle Of Imagination:
The whole thing is over on the ASOI creative team blog now!
Trish xxxx
 P.S.... Don't forget ASOI are having a design team call right now! I love being on the team, and I'm sure you would too!!!

Tuesday 10 September 2013

Inspired by Autumn!

Hello!
Annnnnnd breathe! Kids went back to school yesterday, which means way more playtime for me! yay! (Well, I still have one about to leave for Uni, but as she is *so* fond of telling me, she's an adult now so I don't need to worry about her. Um yeah, that's how parenting works???? Not sure she gets it...... but still, no littles underfoot so expect the blog to be updated with lots of creations!
It was flipping freezing here yesterday, so playing with Autumn colour schemes seemed to be very apt!
I've used PaperArtsy Fresco finish paints in Zesty Zing (the yellow) and Smoked Paprika (orange) as my main colours, with a smidge of brown, Kraft card and rusty wire to add to the overall look. My chipboard was, as ever, covered with a layer of gesso first, a nice bright white to make the coloured layers pop! I also brayered gently with the gesso in between colours, more texture and colour variation!
As you can see, I added a strip of embossed Kraft card, and a torn piece of book page too, just to add in some more detail and texture. The painty layers were carried on over the card and book page. The smoked paprika colour is a translucent paint, so works really well over things like text paper. Loads of stamping....
Dots, grids, lettering and chicken wire! Archival ink is great over acrylic paint, just make sure you dry it off to prevent it smudging!
My butterfly was stamped onto a torn bit of painted Kraft card....
I felt a little more dimension was needed, so stamped again onto acetate and layered the image up!
I discovered some word stickers on a yellow background in my stash, perfect match!
I'm linking up with A Mixed Media Colour Challenge today! The current challenge asks us to use orange, yellow and brown/kraft as our main colours, so I think this fits right in!
All you mixed media peeps out there should go take a look, it's a great challenge for getting the old messy mojo going!
Have a great day!
Trish xxxx


Monday 9 September 2013

Weathered Wood - the blue version!

Hello!
I'm still very much on a weathered wood theme for my post over at Calico Crafts today!
Blue this time, and a heart...
That's just part of it the whole thing can be found on the creative team blog HERE....
Have a great week!
Trish xx

Sunday 8 September 2013

Smitten ....... with colour!

Hello!
For my project over at A Sprinkle Of Imagination today, I've been playing with acrylic inks. Loads of bright vibrant colour!
Here is a little look...
You'll need to pop on over to the ASOI creative team blog to see the whole thing!
Have a great Sunday!
Trish xxxx


Sunday 1 September 2013

One Lucky Day...

That's the message on my card today, but really, if we were being accurate, it should say 'one lucky blogger who finally managed to get a card made a day before deadline'.........!
Who was it who coined the phrase 'clean and simple'?? Um, yeah......that's a little bit impossible for a messy crafter like me!!!
Anyway.....after lots of horribleness that ended up in the bin, I managed to cobble something together for the new challenge starting today over at A Little Bit Crafty! You guessed it, the theme is 'clean and simple' !
In the end, I decided to interpret Clean And Simple in a messy crafter way.... Clean in that there is a fair bit of white space (with no thumb prints!!! Yay!!!!) around the card, and Simple in that there are only three design elements to the piece..... (yep, totally ignoring the 'lots of painty/stamped layers in the square bit'....)
I made a small (10cm by 10cm) painty panel. This is a perfect way to use up all those masterboard bits you may have - smaller sections cut from a bigger piece of painty fabulousness! All the paint I used today was PaperArtsy Fresco finish, Zesty Zing, Smoked Paprika, Guacamole and London Bus. (Or, yellow, orange, sage green and red!)
I used some background stamps to add a touch of black stamping...
My wire flower was made by twisting rusty tin wire into six oval petal shapes. These were glued down, then I added a circular wire centre...
This was done by winding the wire four times around an alcohol ink bottle (great size!!), then wrapping the ends over and over to secure the circle. I covered a scrap of book page with paint and stamping to match the base, then glued the circle to it. Once dry, cut out and glue on top of the petals!
I'm absolutely certain you'll be much better at Clean And Simple than I am...why not create a little something and enter it in the challenge over at ALBC?
Have fun!
Trish xxxxxx